

Hey there! As a breaker circuit supplier, I've had my fair share of experiences with installing breaker circuits. It's a task that might seem a bit daunting at first, but with the right know - how and a bit of patience, you can get it done smoothly. In this blog, I'll walk you through the process of installing a breaker circuit step by step.
Step 1: Gather Your Tools and Materials
Before you start any installation, you need to make sure you have all the necessary tools and materials. Here's a list of what you'll typically need:
- Circuit Breaker: The heart of your breaker circuit. You can check out our 800 Amp Circuit Breaker - MCCB which is a great option for high - power applications.
- Screwdriver Set: Different sizes are required for removing and attaching panels and wires.
- Wire Strippers: To strip the insulation off the wires.
- Voltage Tester: This is crucial for safety. It helps you determine if there's any electrical current in the wires.
- Electrical Tape: To insulate the connections and prevent short - circuits.
- Cable Clamps: To secure the wires in place.
Step 2: Safety First
Safety is super important when dealing with electrical work. Here are some safety measures you should follow:
- Turn Off the Power: Before you start working on the breaker circuit, turn off the main power supply to your home or the area where you'll be installing the circuit. This will prevent any accidental electrocution.
- Wear Protective Gear: Put on rubber gloves and safety glasses. Rubber gloves act as an insulator and protect you from electrical shock.
- Work in a Dry Area: Water and electricity don't mix well. Make sure the area where you're working is dry.
Step 3: Plan Your Installation
Planning is key to a successful installation. Here's what you need to do:
- Determine the Location: Decide where you want to install the breaker circuit. It should be in a well - ventilated area away from flammable materials.
- Measure the Space: Make sure there's enough space for the breaker panel and the wires. You don't want it to be too cramped.
- Check the Electrical Load: Calculate the electrical load that the new circuit will carry. This will help you choose the right size of the circuit breaker.
Step 4: Install the Breaker Panel
Now it's time to install the breaker panel. Here's how:
- Mount the Panel: Use the appropriate screws to mount the breaker panel on the wall. Make sure it's level and secure.
- Connect the Wires: Connect the main power wires to the breaker panel. Use the voltage tester to make sure the wires are not live before connecting them.
- Install the Circuit Breakers: Insert the circuit breakers into the slots in the breaker panel. Make sure they fit snugly.
Step 5: Connect the Wires
Connecting the wires is a crucial step. Here's what you need to do:
- Strip the Wires: Use the wire strippers to strip about 3/4 inch of insulation off the ends of the wires.
- Connect the Hot Wires: Connect the hot wires (usually black or red) to the circuit breaker. Make sure the connections are tight.
- Connect the Neutral Wires: Connect the neutral wires (usually white) to the neutral bus bar in the breaker panel.
- Connect the Ground Wires: Connect the ground wires (usually green or bare copper) to the ground bus bar in the breaker panel.
Step 6: Test the Circuit
After you've connected all the wires, it's time to test the circuit. Here's how:
- Turn On the Power: Slowly turn on the main power supply.
- Check the Breaker: Make sure the circuit breaker is in the "on" position.
- Use the Voltage Tester: Test the outlets and switches connected to the new circuit to make sure they're working properly.
Step 7: Additional Considerations
There are a few additional things you should keep in mind:
- Code Compliance: Make sure your installation complies with the local electrical codes. This will ensure the safety and legality of your installation.
- Future Expansion: If you think you might need to add more circuits in the future, plan for it during the installation. Leave some extra space in the breaker panel.
Step 8: Optional Accessories
You might also want to consider some optional accessories:
- 30kA Grid Connected Box: This is useful if you want to connect your breaker circuit to the grid.
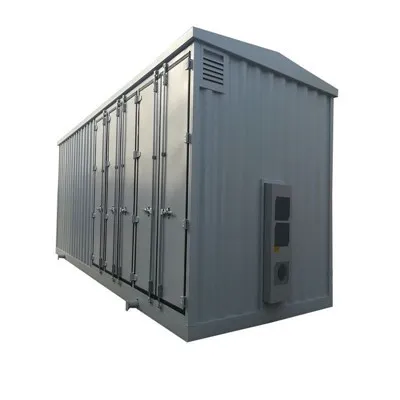
- Pre - installed Substation: If you're dealing with a large - scale electrical system, a pre - installed substation can be a great addition.
Step 9: Troubleshooting
If you encounter any problems during the installation, here are some common issues and solutions:
- Circuit Breaker Keeps Tripping: This could be due to an overloaded circuit. Check the electrical load and reduce it if necessary.
- No Power in the Circuit: Make sure all the connections are tight and there are no loose wires. Use the voltage tester to check for any breaks in the circuit.
Step 10: Maintenance
Once the breaker circuit is installed, regular maintenance is important. Here's what you should do:

- Inspect the Circuit Regularly: Check for any signs of wear and tear, such as frayed wires or loose connections.
- Clean the Breaker Panel: Dust and dirt can accumulate in the breaker panel over time. Use a dry cloth to clean it.
If you're interested in purchasing breaker circuits or any of the accessories we've mentioned in this blog, feel free to reach out to us for a procurement discussion. We're always happy to help you find the right products for your needs.
References
- Electrical Installation Manuals
- Local Electrical Codes Guides
- Safety Guidelines for Electrical Work


